
Whenever I head back to my mum's house I always find myself rumaging in her craft room for new patterns and yarns to take home and create. She never fails to inspire me to get making. So when I stopped by a few weeks ago for a Sunday roast (why do parents' roasts always taste better?), I spotted a pattern for some crocheted bunting and had to give it a go.
The pattern was in Simply Crochet (issue 45), a magazine that is great for beginner crocheters. Their designs are always really easy to follow and there is a range of levels and projects to get involved with. The bunting is made up of granny square triangles using double knit yarn, I followed the pattern but added my own twist and steps in certain areas, so here's how I made this crocheted bunting...


Equipment:
6 colours of double knit yarn
Needle
Sewing up neddle
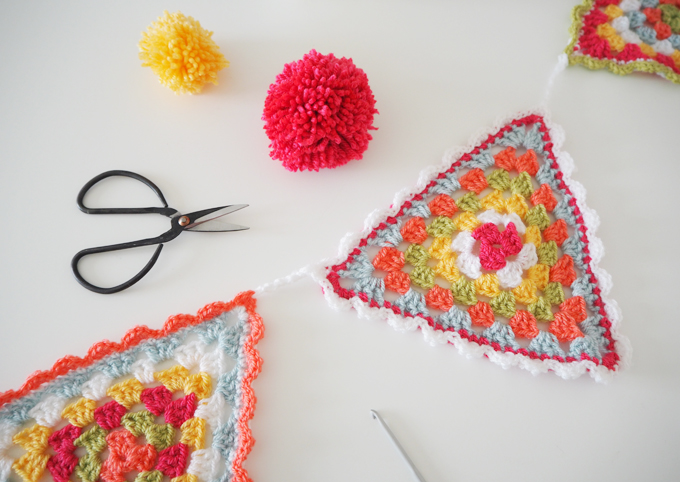
Scissors
I used StyleCraft double knit yarn in various colours and this yarn recommends a 4mm needle so I used that.
This pattern uses chain stitch (ch), slip stitch (ss), treble (tr) and double (dc). These are UK terms, if you are more familiar with US terms replace tr with double stitch and dc with single stitch in this pattern.
Start by making a loop in your first colour, insert your hook and make a chain of four before slip stitching into the first chain you made to create a small ring.


Once you have created a ring, chain three, this will act as your first treble.
Make two treble crochet into the center of the ring, chain three. Repeat this twice so you get three clusters of trebles separated by three chains. Slip stitch to join.


Change colour then using the same technique create clusters of three trebles, three chains followed by three trebles in the same chain space from the row below. Separate each cluster with one chain space before moving to the next space. Your work should look a little like the image below.

For the third round of the bunting, join in another colour to any chain space on the row below. Create a cluster of three trebles, three chains and three more trebles.


Chain one before moving to the next space and making three trebles.
Chain once, then move to the next corner space and make a cluster of three trebles, three chains followed by three more trebles into the same corner space. Repeat all the way around until your work looks a little like this. Clustering trebles into the corner creates the points of your bunting.


Continue changing colours on each row and growing your triangle bunting. By only creating clusters in the corners of your work you will create that point on the triangle. For my edging I ran a row of double crochet around my work. I then switched colour and created a scalloped edge by making five double crochets into the same space, slip stitching for two then repeating this all the way around.


To join other triangles together and create the bunting, I made a chain of eight in between each triangle piece. I tried in all my ends and added loops at each end so I could pin it up on my wall. I also stretched and set my triangles to finish them off by wetting, pinning and then drying them out for the afternoon. This ensured the triangles stayed crisp and didn't curl up at the edges too much.
This pattern is a great little lazy afternoon project that you can dip in and out of or pick up whenever you are feeling in the crochet mood. I loved deciding which colour to use next and seeing the bright combinations come to life as each triangle grew bigger.
You can customised your bunting by adding or taking away rows depending on the size you want. How cute would some mini bunting triangles be?! Or why not create some halloween themed bunting using spooky colour combos to decorate your house this coming month. So many ideas!


I hope you have enjoyed this little demo of how I made my bunting, I am no expert when it comes to crocheting and am simply sharing my journey of learning this skill with you. If you would like the more info about the original pattern check out Louise Smiths Ravelry page or look out for it in issue 45 of Simply Crochet.
Anna
x
No comments
Post a Comment